Rental calendar and list view
You can view rentals in several different ways. The default mode is calendar view. Here you can see your vehicles grouped by category on the left. These form the rows of the calendar. The columns of the calendar are made up of the days. You can use the search boxes to enter several criteria at once to narrow down the results, making it easier to find rentals, or to create simpler reports.
Calendar view
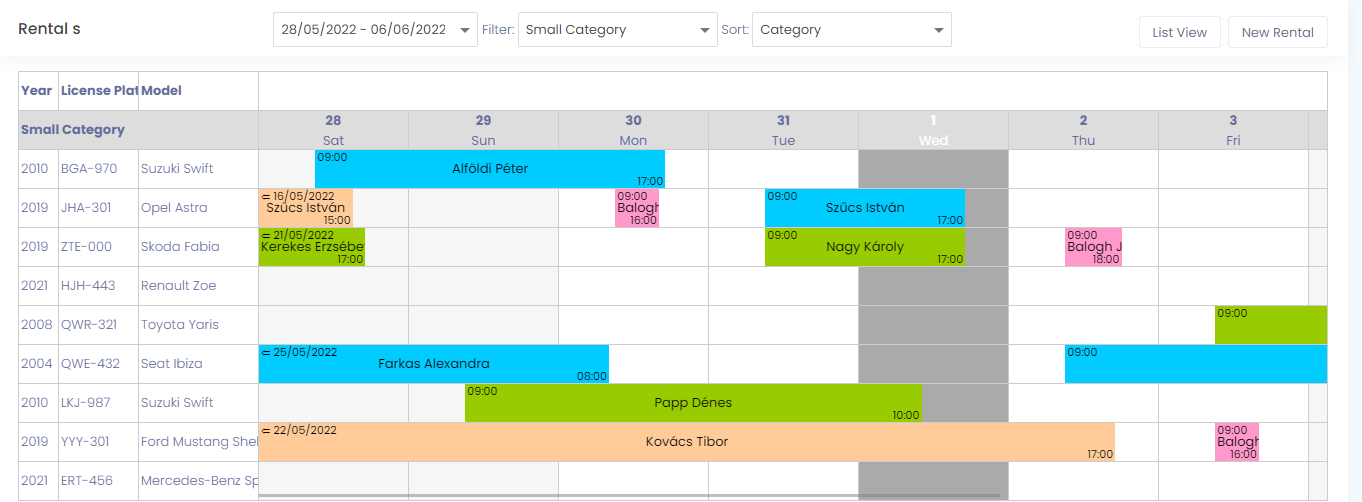
In Calendar view, you can see a list of days in a given period. By default, this period is 10 days (4 days before and 5 days after the current day). You can change the period you want to see by using the date picker above the calendar. The maximum period that can be displayed in the calendar is 31 days. (In case the selected period exceeds 31 days, the 31 days will be counted from the earliest selected date.) The easiest way to select the calendar is to click on the first and last day of the period you want to view, and the calendar will be updated automatically.
The cells of the calendar are proportionally spaced, so you can see the time of the rental not only by the time displayed, but also by its position in the calendar. A cell has 24 parts, each representing an hour.
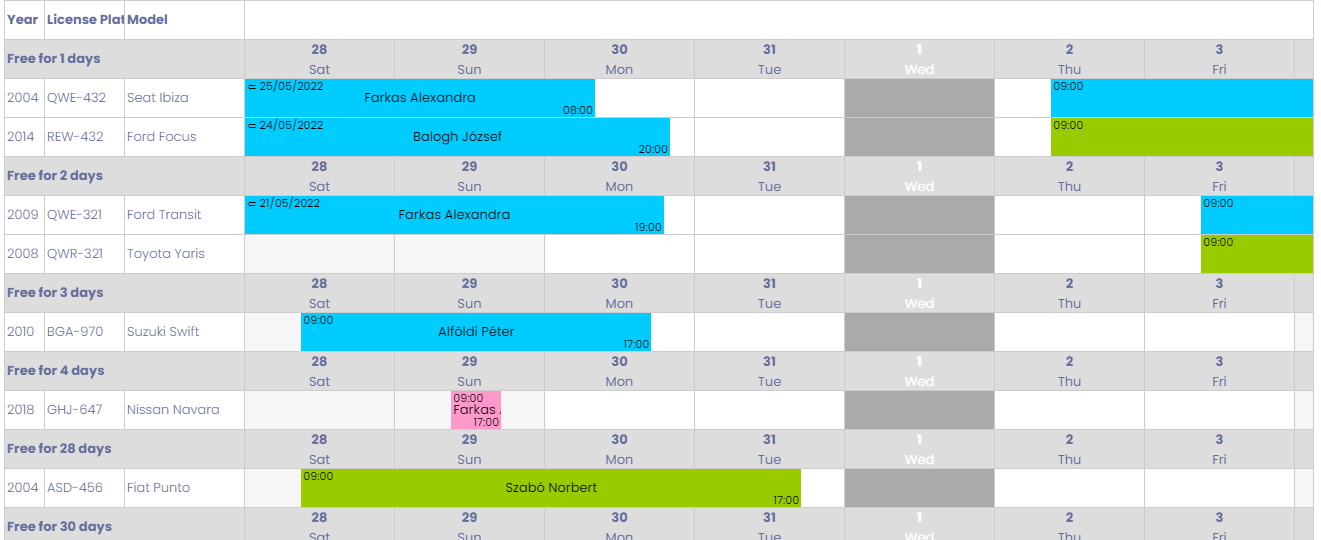
Active vehicles are displayed in groups, so they are separated from each other. By default, the grouping is based on the category of the vehicle, which can be set in the vehicle's data sheet, and a new category can be added and modified in the Vehicle categories menu under Settings. In addition, you can select Sort by Free Days from the Sort by list above the calendar. In this case, the vehicles are sorted by the number of free days before the first rental is expected to occur.
You can add a new rental by using the New Rental button above the calendar, the New Rental button in the Quick Menu, or by clicking on the day in the calendar in the row of the vehicle.
In the calendar, the colored rectangles represent rentals. The colors are determined by the category of the rental, which can be entered and modified under the Rental Types menu on the Settings page. These rectangles show the start time of the rental (top left), the end time of the rental (bottom right) and the name of the customer (middle). The rental time is displayed in hours and minutes. In case the rental time falls outside the currently displayed period, the period is displayed as date. When the mouse pointer is moved over the rental, the above data is also displayed.
In the calendar, you can also filter using the filter above the calendar. This filter applies to the selected period. When filtering, you can select the Available vehicles option, which, when selected, will only display vehicles in the calendar for which there are no active rentals for the selected period (period indicated in the date selector). Additional options can be the category and make of the vehicles.
List view
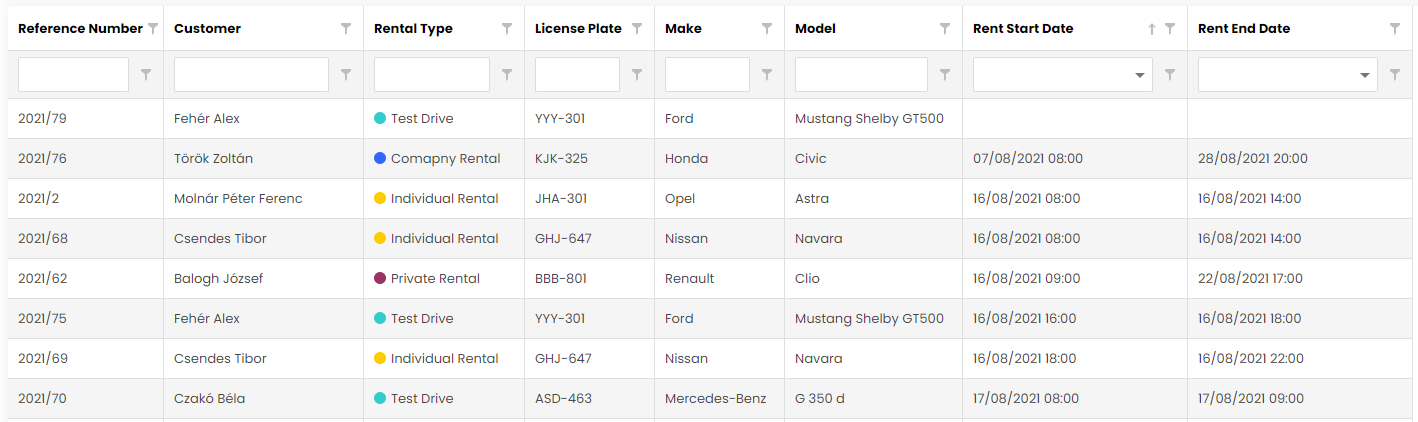
In List view, you can see the rentals displayed in a list. In this view, you can see all the rentals, including those that do not appear in the calendar view. Here you can also see rentals where the rental period has not been defined or the rental is for a vehicle that is already archived.
Above the list there is a quick filter: Week (current week), Month (current month) and Undated (all without dates). The columns can be sorted in any order you like and their width can also be adjusted. They can also be restored to their original layout using the Restore Layout button on the right. The Export to Excel button next to it allows you to export the data in the list to an Excel spreadsheet.
At the top of each column there is a search box that you can use to find specific information in that column. Click on the column name to sort the rows.
Direct calls and messages
In both views, clicking on a rental gives you four menu options to choose from: Open, Edit, Pick-up, Return. You will also find the contact information for the client or contact person (phone number and/or email address).
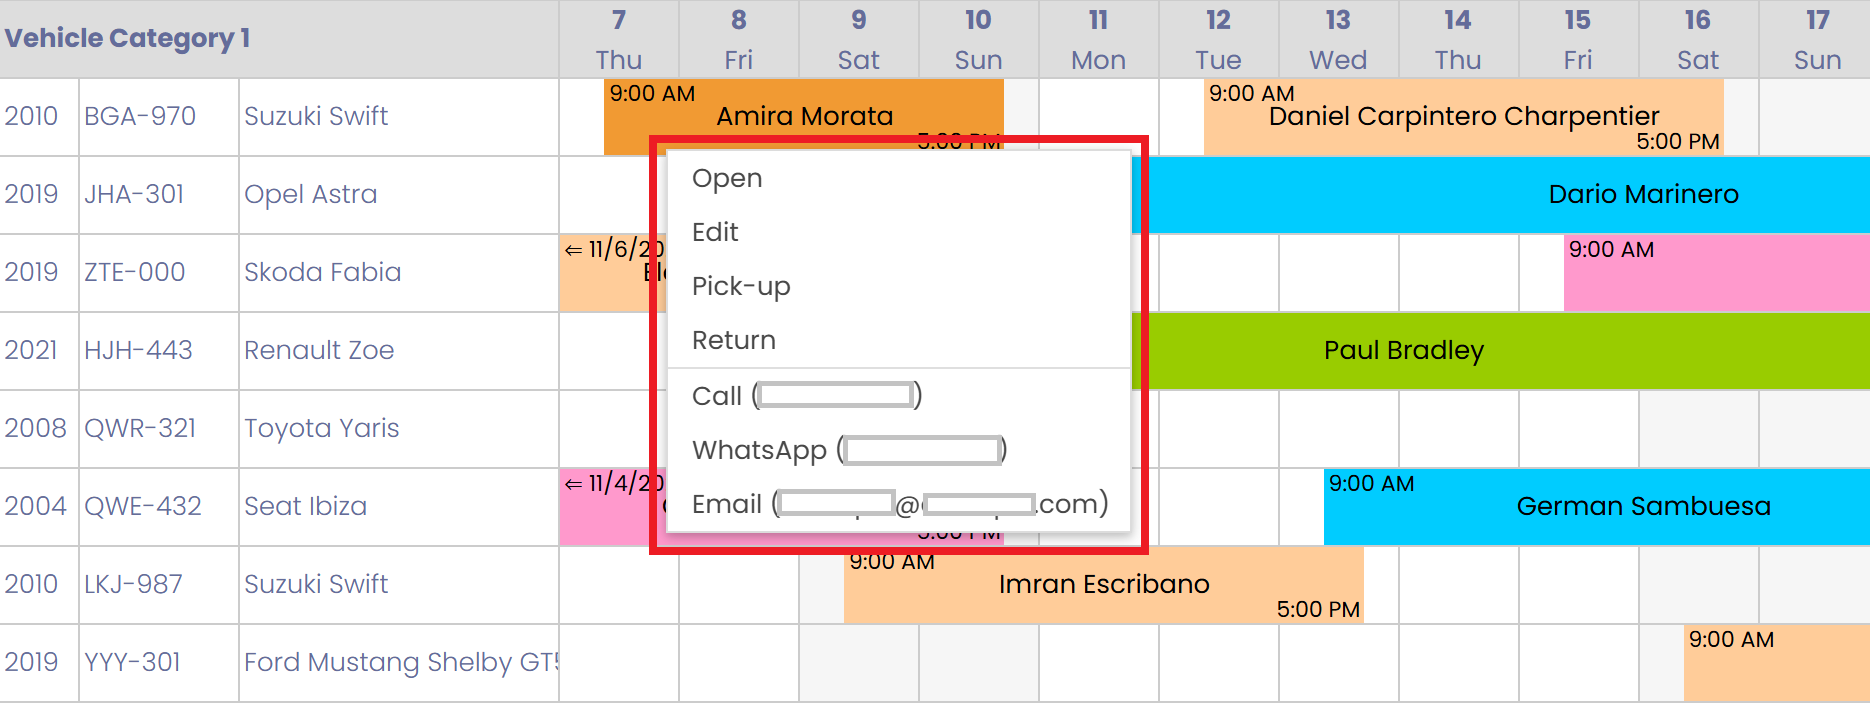
If a phone number is available, you can call or message the person directly from Rentgine using your mobile phone. On a desktop computer, you can place a call by selecting an available application installed on your device (such as 3CX, Skype, Zoom Phone, or others). WhatsApp is available on both mobile and desktop, making it easy to stay connected from any device.